A few weeks ago, I dry aged a slab of Australian Sirloin in my home. Due to my curious nature, the slab of meat only lasted 14 days in the fridge. It was already showing dry aging features, pellicles were already formed. The engineer in me was too hard to ignore haha.
My guide for dry aging at home came from Guga, the sous vide master. Here are a few links from the masterful Guga.
From the videos Guga posted, there’s 1 key ingredient for dry aging and that is the membrane to cover the meat slab while you put it in your fridge. It is Umai Dry Age Bags. I can’t find it here in Indonesia but I found a seller in Singapore by the name of Joe, here is his post in Carousell. I recommend you chat him, he’s an incredible guy who will help you along the way.
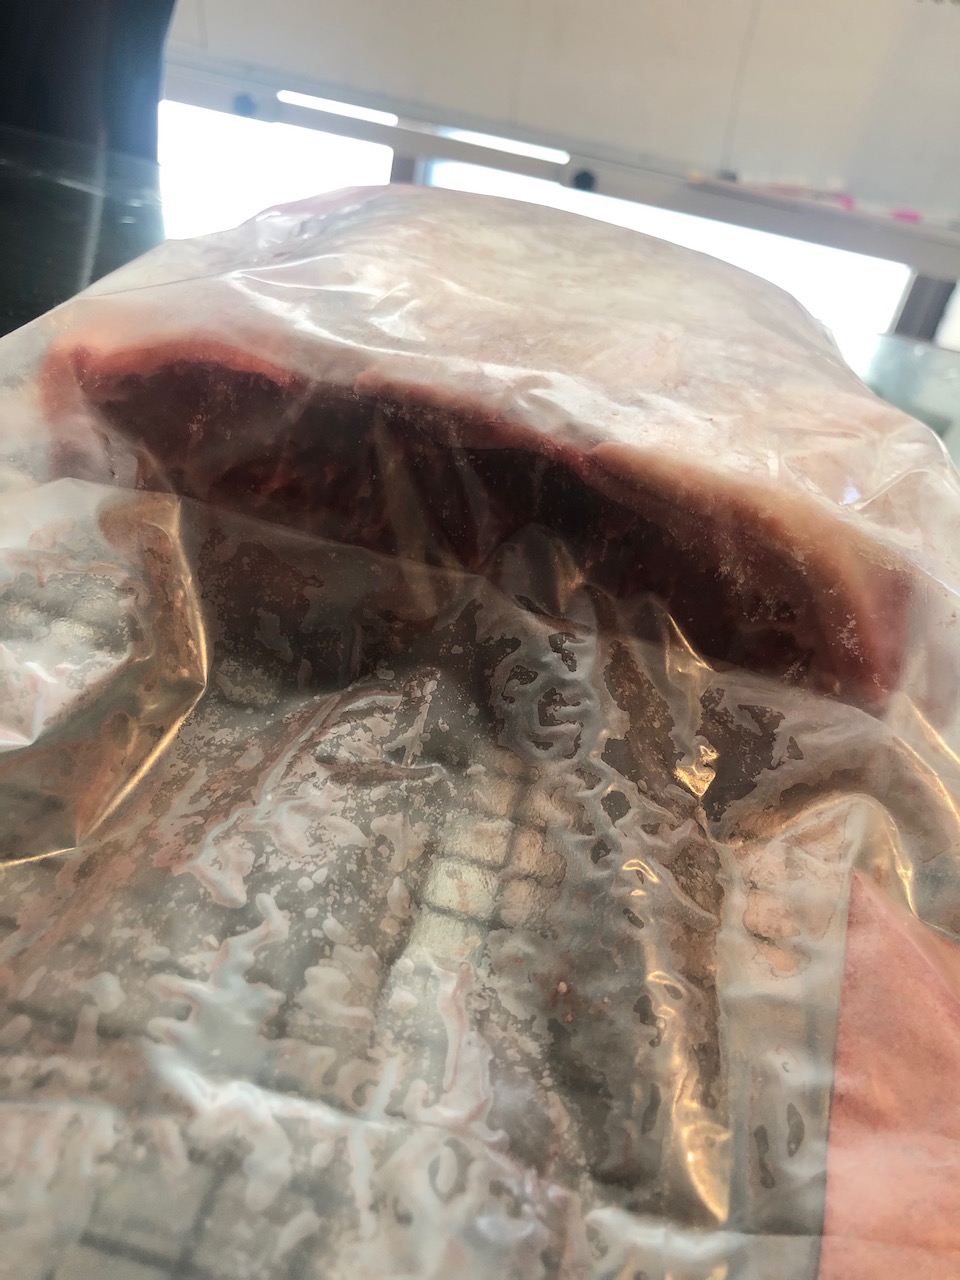
Unfortunately I don’t have photos before I dry aged the meat, I only have photos after 14 days. The steps are easy though, you don’t have to be a rocket scientist. Here’s how:
- Get a slab of meat to dry age. I don’t have any preferences for any cut of meat, I tried it with Australian Sirloin.
- From the butcher, I asked for the meat to be vacuum packed instead of its original packing. This is so I can defrost the meat faster.
- Defrost the meat by just putting it into a bowl or container large enough for the meat to sink into. I got a 2 kg sirloin, it took around 30-45 minutes to defrost.
- Get an Umai bag that fits your meat slab, you can cut the bag if the bag is longer than your slab of meat.
- Cut the vacuum packed slab and slide it in into the Umai bag. Make sure you don’t throw away all the juices, the Umai bag needs it to stick to the meat.
- This is the tricky part, you need to vacuum seal the bag with the included fabric from the Umai pack. First you seal diagonally and using the fabric in place, seal horizontally. You can’t seal it tight but make sure the Umai bag sticks to the slab.
- Put your meat in your fridge and don’t forget to put it on top of a cooling rack so that the air flows underneath.
- Wait 14-35 days.
- Win!
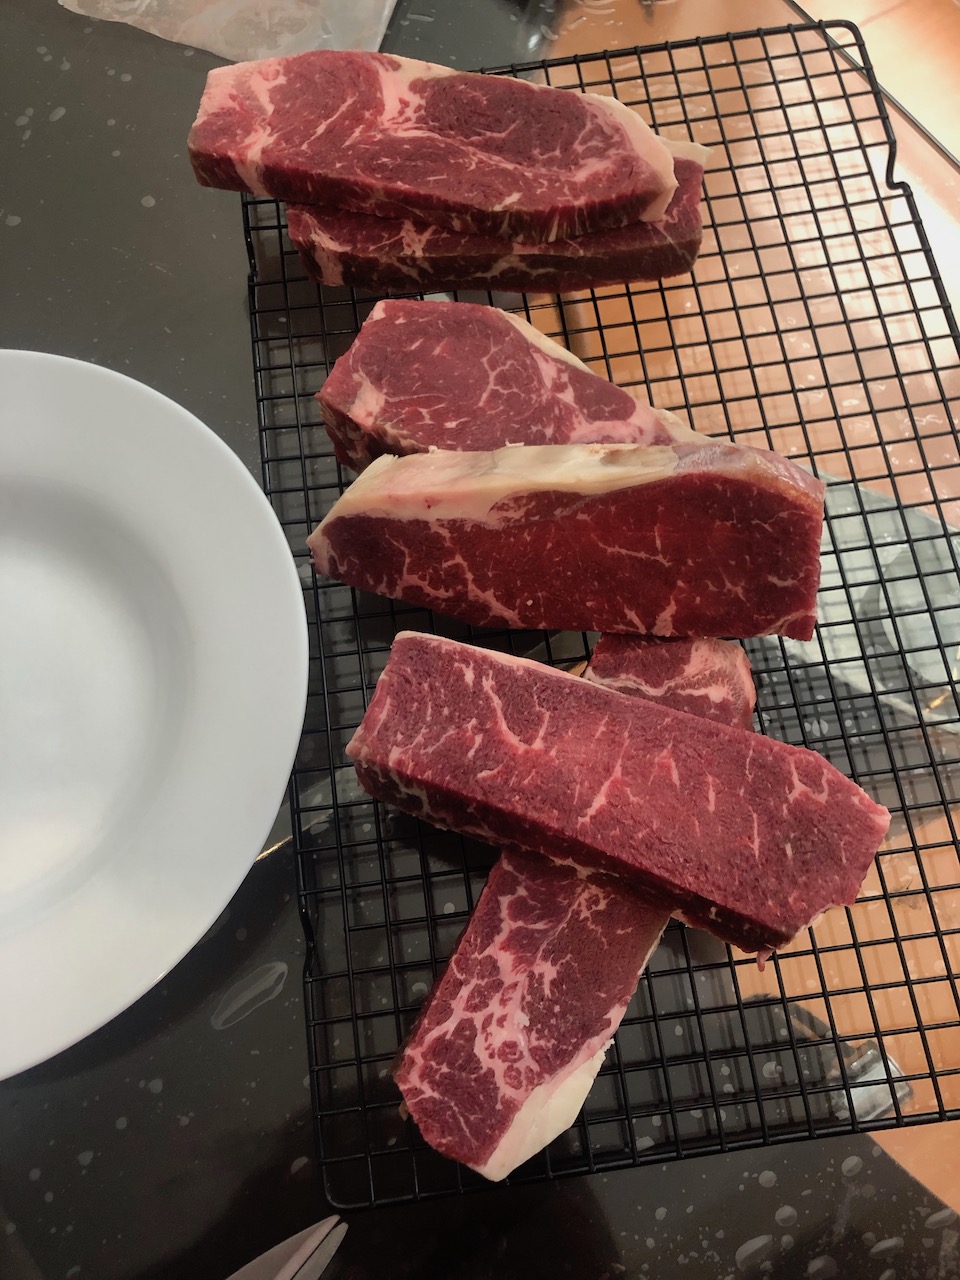
Here’s how mine looks like after 14 days.
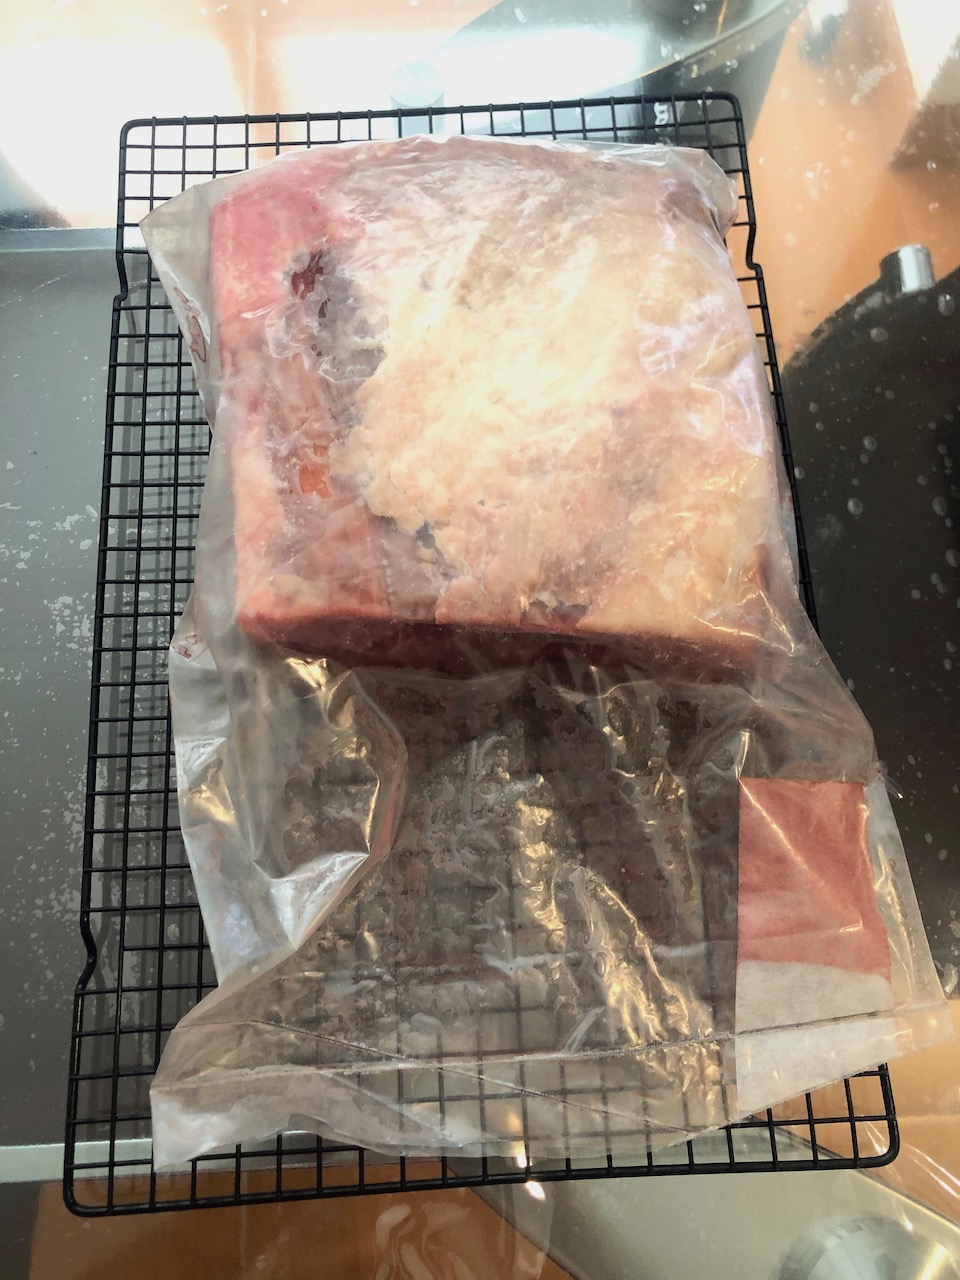
And here’s how it looks after it was removed from the bag.
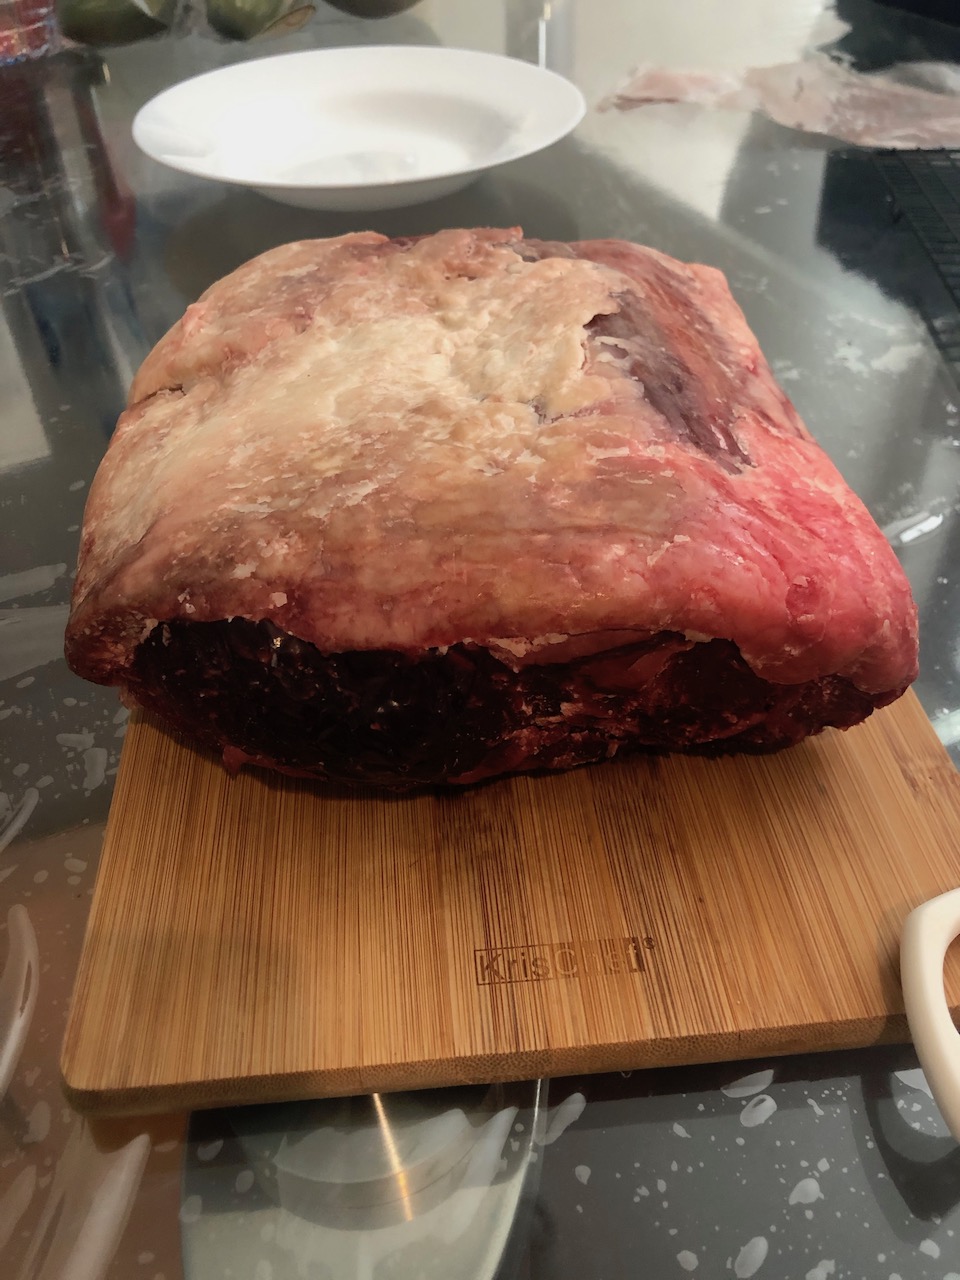
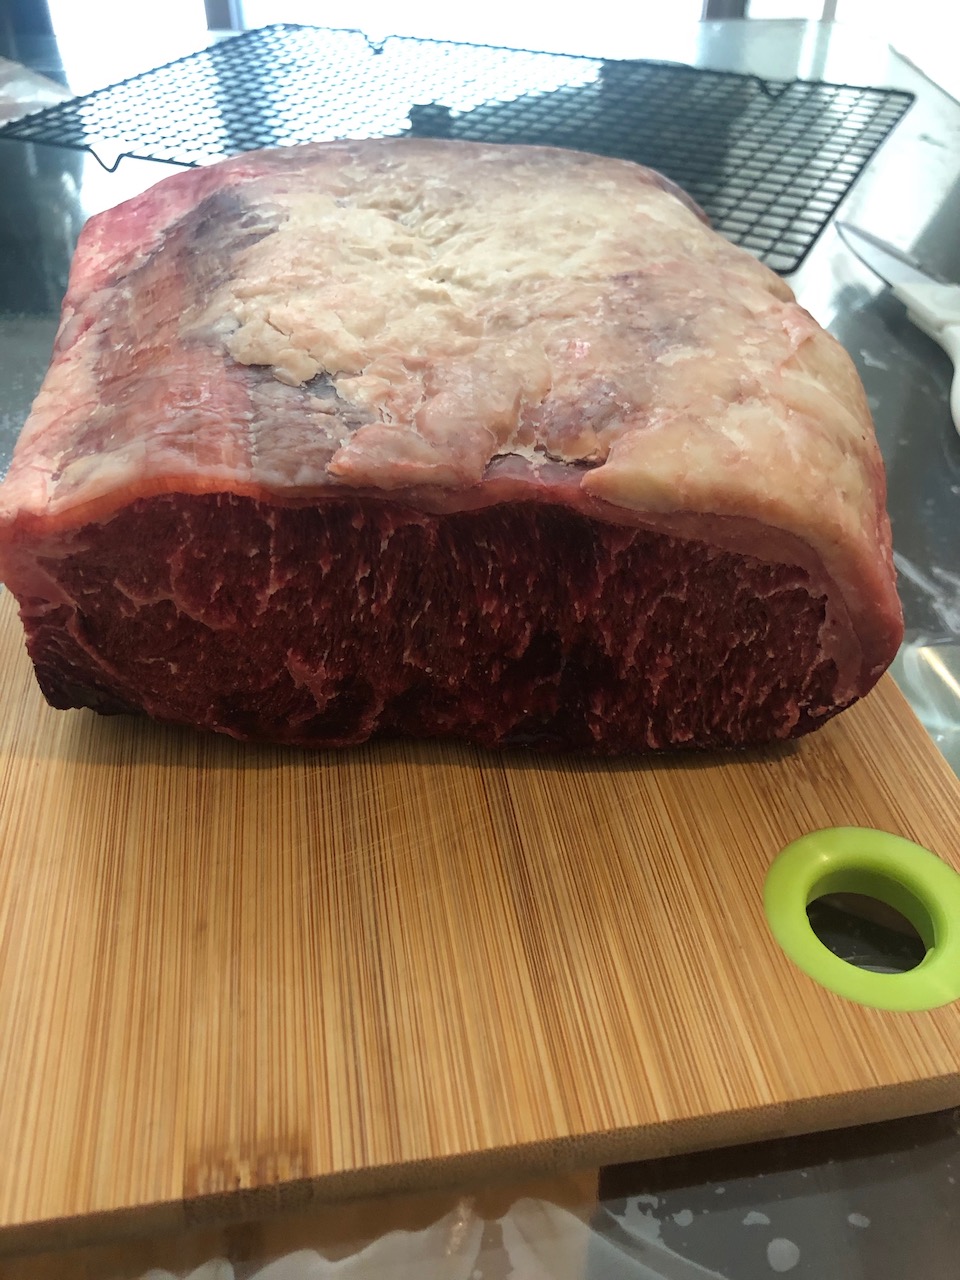
Get yourself a really sharp knife, it’s time to cut the pellicles and harvest the meat.
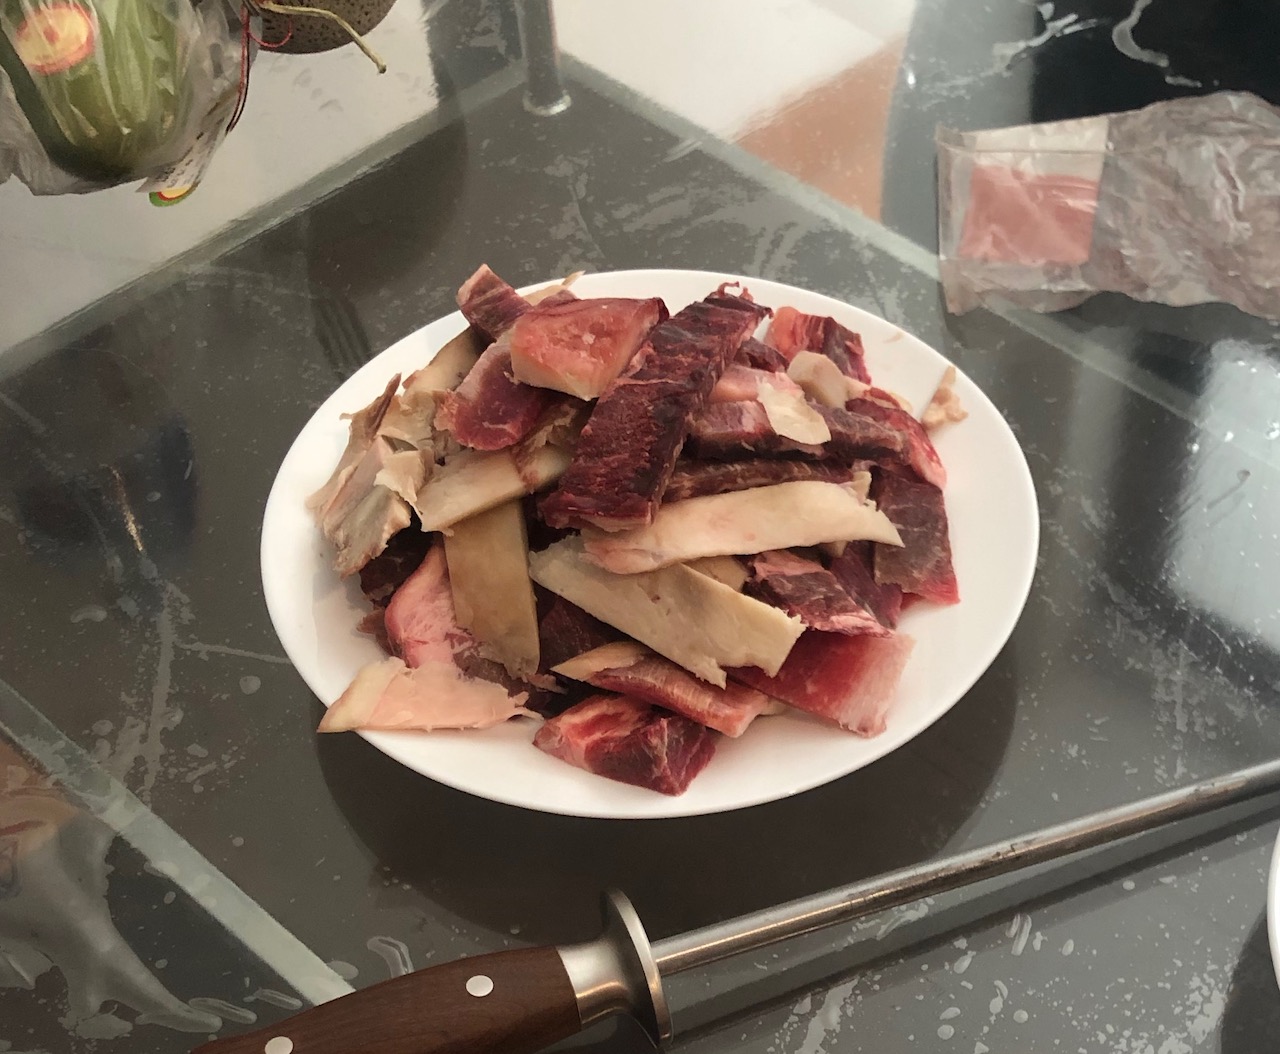
This is how much meat I got from the experiment.
You see the marbling there? That’s why I like this particular Australian Sirloin at Indoguna BSD.
My conclusion is dry aging at home is very easy. It’s safe and there’s not much effort into it. The Umai bag really did its job to let moisture out and nothing in. If you want to try this, please don’t use local Indonesian beef, you’re waiting for days, you want the meat to be delicious.
What is different from regular versus dry aged beef?
- Tenderness is different, just 2 nights ago I cooked the last harvest of dry aged beef with a regular Australian Sirloin. It’s not very tender since it was only 14 days but it was definitely more tender than the regular one.
- The beefy flavor is just amazing. It’s hard to describe, the beefy flavor is concentrated, some people call it nutty but it’s just concentrated IMHO. You will not get this by seasoning your regular steak with beef stock cubes, you won’t. You just have to try it.
If you order dry aged steak from a steakhouse, it’ll be more expensive than you might think. Just do it at home, it’s not just about price, it’s an experience. Checking on the slab of meat everyday is a motivation for me when I cook. I WILL NEVER GET BORED OR TIRED OF STEAK.
Happy experimenting!