Boy this was a rabbit hole necessary for my eyes and their well being. I have 2 monitors and both of them are 1440p Ultrawide and 1440p Super Ultrawide. Out of the box, Apple Silicon Macs doesn’t rate these monitors as HiDPI, external monitors are rated as HiDPI if it’s at least a factor of 2x. What is the cheapest and straightforward solution to make 1440p monitors as HiDPI? This post answers that question.
Both my monitors are:
- Samsung Odyssey Neo G9 - 5120x1440@240Hz
- Xiaomi 34" Ultrawide - 3440x1440@144Hz
The first challenge is getting high refresh rate to work and then getting the resolution scaling right.
High Refresh Rate
The only answer here is to use DisplayPort either through Thunderbolt or USB-C. If you’re opting for USB-C, make sure you buy a high bandwidth USB-C cable rated for 8K. The methods below works both on my Macbook Air M1 and Mac Studio M1.
Via Belkin Thunderbolt 3 Express
My first try was using my Belkin Thunderbolt 3 Express dock, it has a DisplayPort port on the back. Depending on the resolution of your monitor, you will get different refresh rates available, I think because bandwidth is limited.
- Samsung Odyssey Neo G9 via Belkin Thunderbolt 3 Express dock: 5120x1440@120Hz
- Xiami 34" Ultrawide via Belkin Thunderbolt 3 Express dock: 3440x1440@144Hz
Even in my Windows gaming PC with a 3080 Ti connected through DisplayPort 1.4/HDMI 2.1, the Samsung Odyssey Neo G9 always falls short of its advertised 240Hz refresh rate. Windows gave all kinds of weird display issues, black screens, etc. I just leave it to connect with HDMI @ 144Hz.
Via USB-C to DisplayPort 8K Rated Cable
This is the cleanest solution for me, I didn’t need to have an intermediary on my desk just to connect to the monitor. The keyword here is that the cable must be rated 8K to ensure bandwidth is aplenty.
- Samsung Odyssey Neo G9 via USB-C to DisplayPort Cable: 5120x1440@120Hz
- Xiaomi 34" Ultrawide via USB-C to DisplayPort Cable: 3440x1440@144Hz
HiDPI
Now this is the most challenging, the noise level in the interweb of people encountering the same problem and complaining to Apple about this is too much to read 1-by-1. So I’m posting here what I found work for my use case, let me repeat the use case:
- 1440p Screen
- High Refresh Rate (at least 120Hz)
- HiDPI
SwitchResX
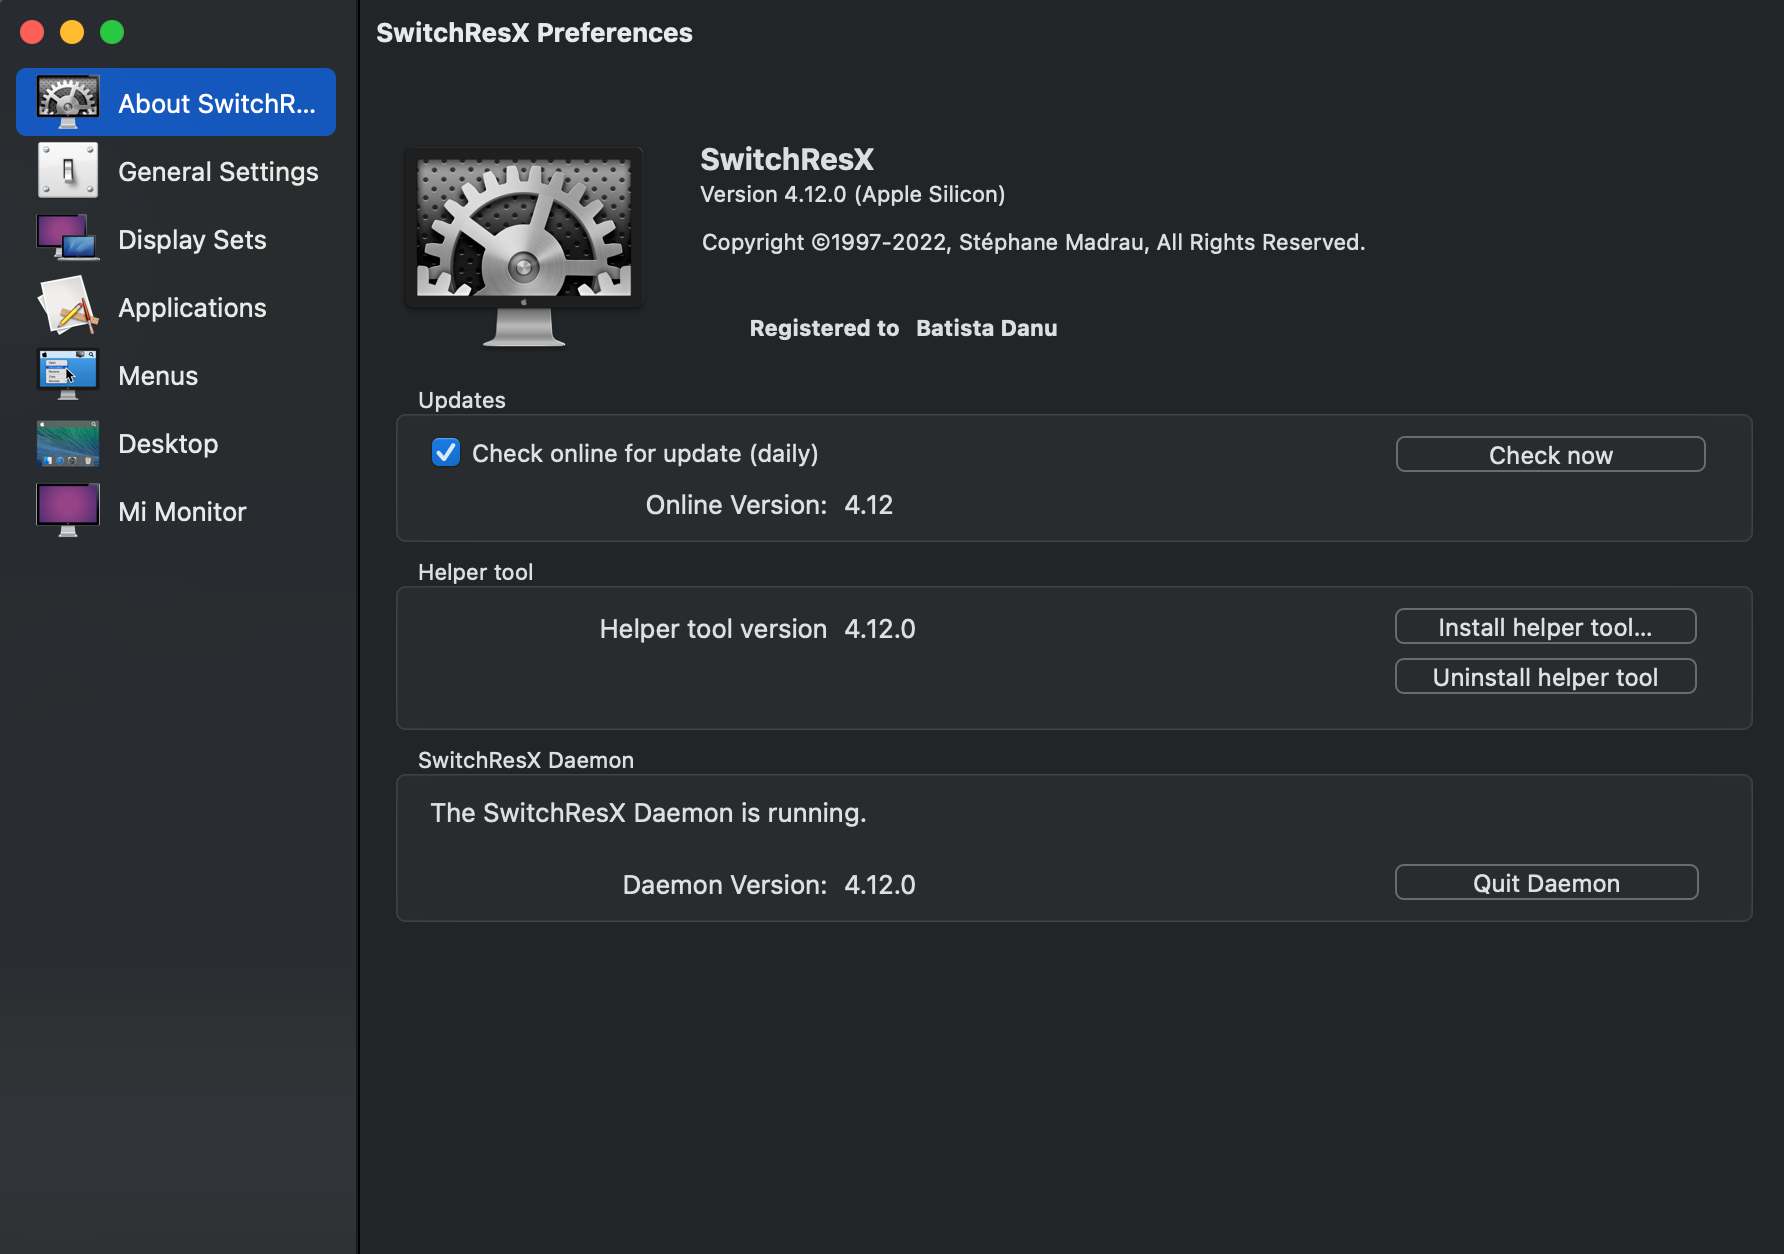
The only solution that works is only SwitchResX. Pay $16 for this great piece of software, it’s worth it. You can do a free trial and see if it works for you and pay for it if it does.
For SwitchResX to work, you need to disable System Integrity Protection (SIP) once, do the necessary changes in SwitchResX and turn SIP on again.
Turning Off SIP
Shutdown your M1 machine. Once it’s completely off, power it on and keep pressing the power button until you see a Options. Select it and you will brought to your recovery partition to boot from.
Once you’re in, you need to enter your password for the machine. On the top left menu select Utilities > Terminal. Enter this command:
| |
You will be prompted to enter your password. Afterwards, restart the machine.
SwitchResX Configuration
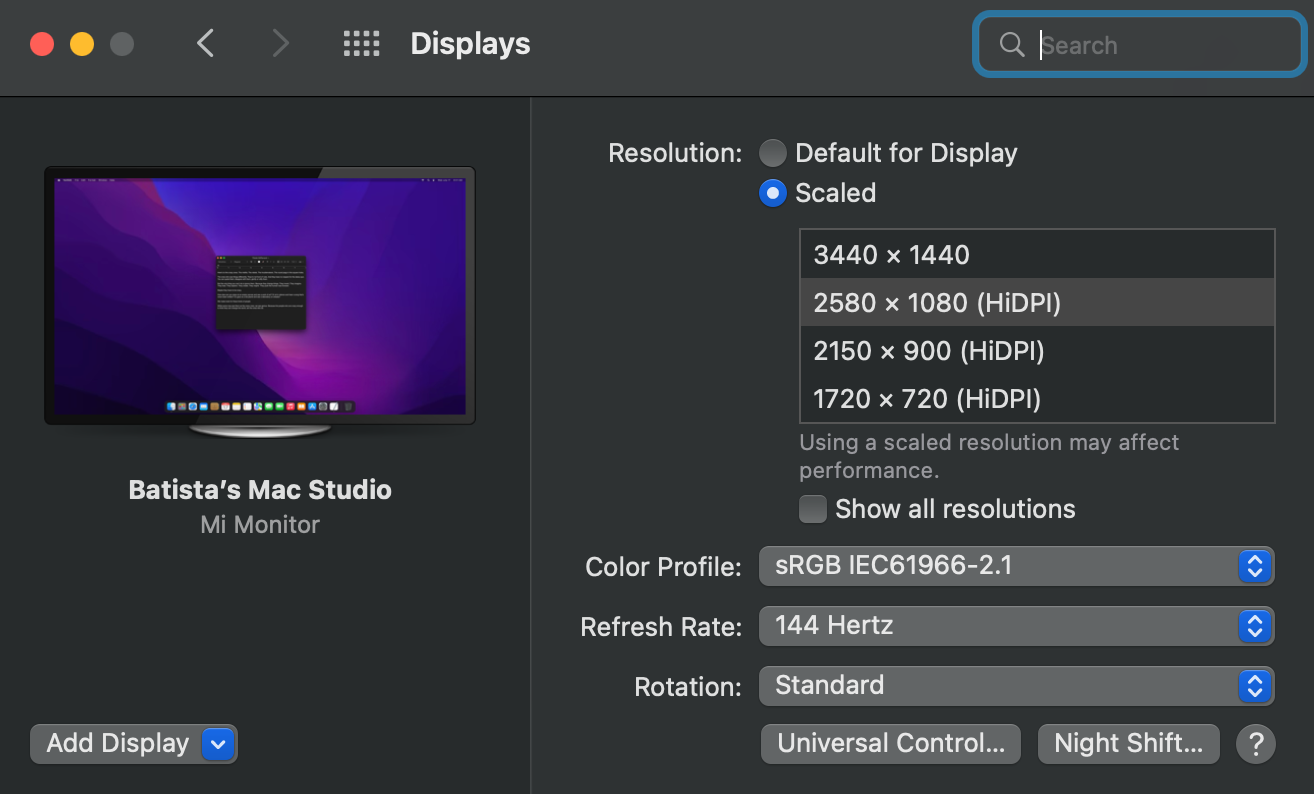
The monitor I want to scale is my Xiaomi 34" Ultrawide, it’s native resolution is 3440x1440. I want to scale this to 150% which means I need to create a custom scaled resolution of 5160x2160. To apply HiDPI, macOS will then scale half of this resolution which is: 2580x1080, we will select this HiDPI resolution later on.
For SwitchResX to work, make sure you Install Helper Tools and Launch Daemon. Also look to launch daemon at startup.
Next we need to create a Custom Scaled Resolution. Select your monitor, mine is named Mi Monitor on the bottom left. Then go to the Custom Resolution tab.
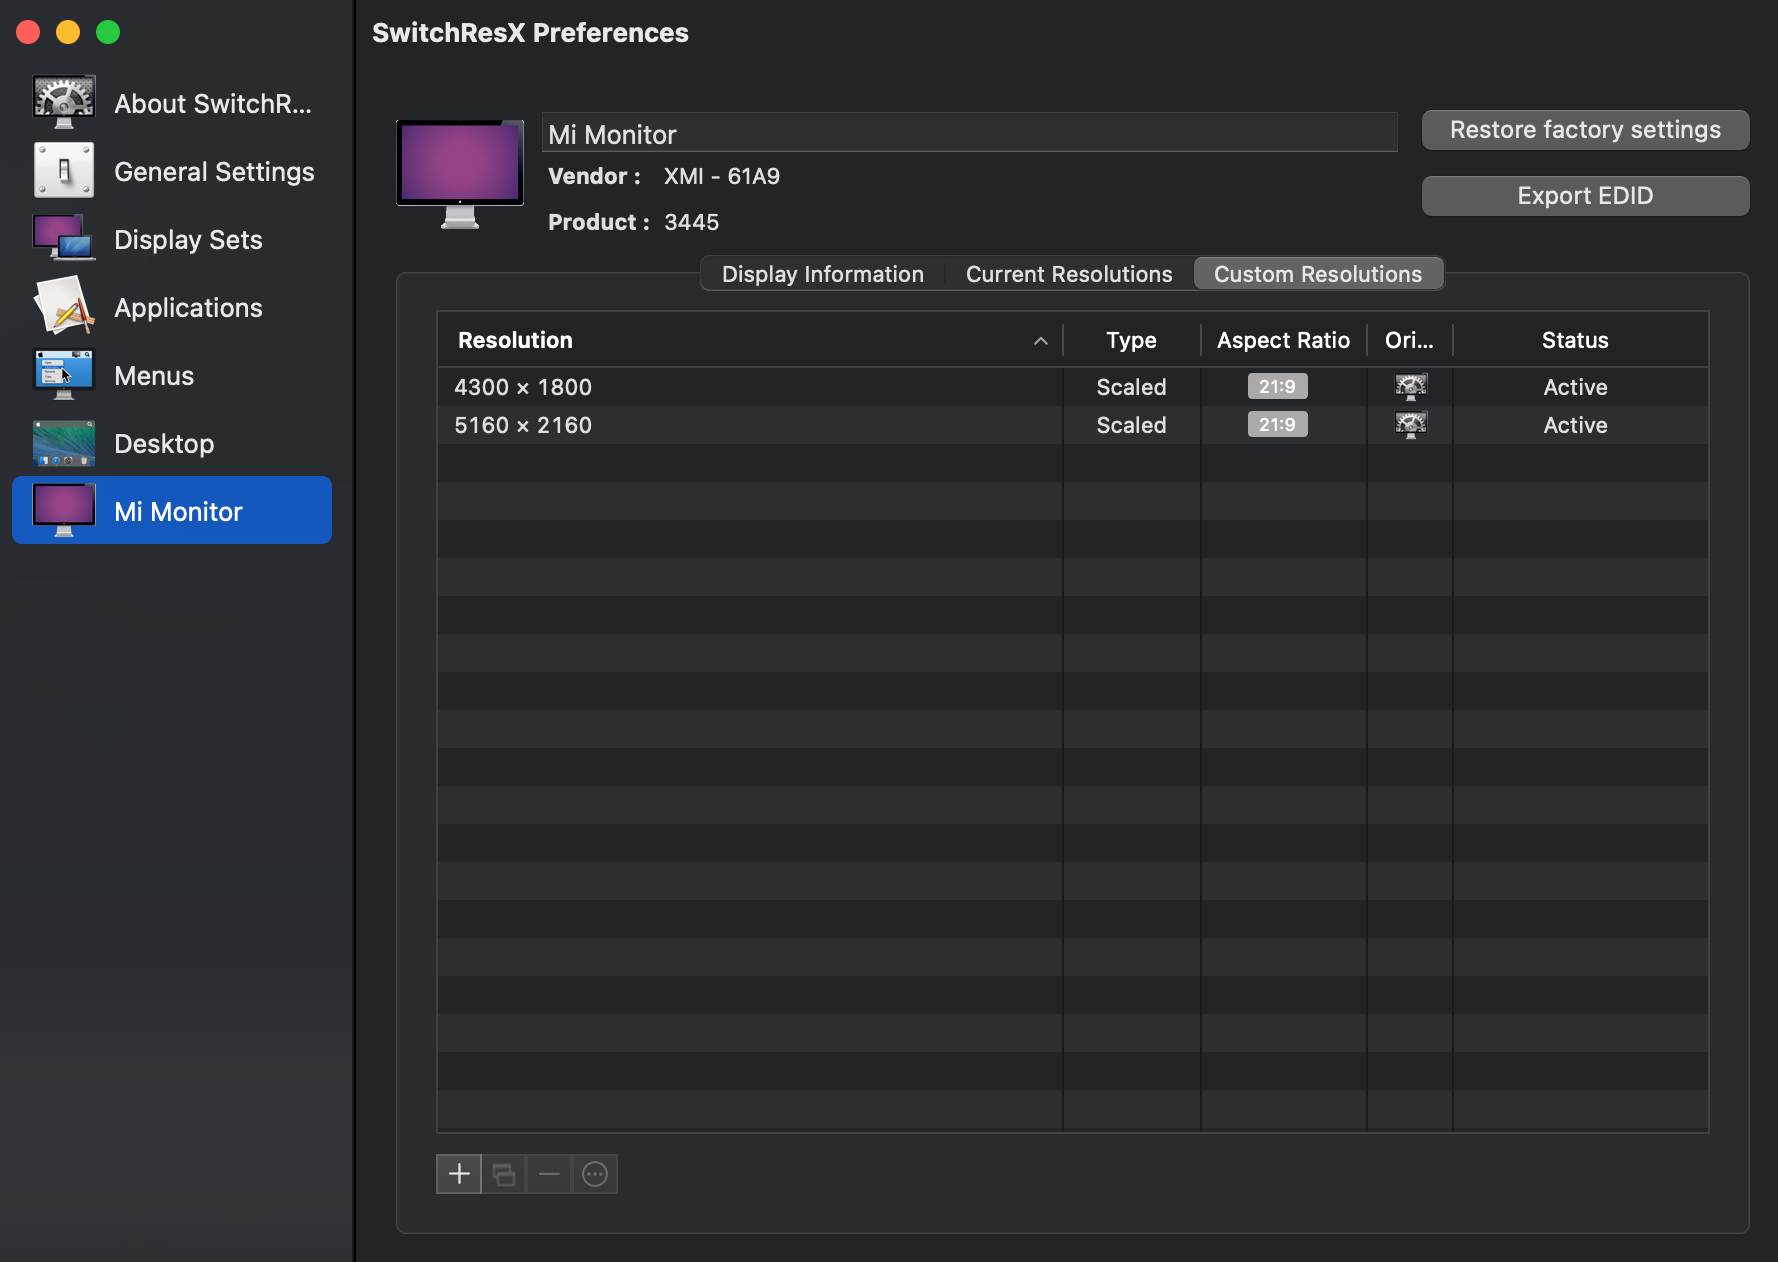
Click on the + sign on the bottom left and input your desired custom scaled resolution. Quit SwitchResX and you will be asked to save the modifications. Afterwards just restart. Once you’re back in go to System Preferences > Displays.

Now the halved resolution (2x Retina) is available and marked as HiDPI. Some monitors will not show these resolutions and will instead have options of Smaller or Larger Texts. I think you can improvise there.
Oh Apple, this could be a lot simpler.
Nevertheless, this solution is the best solution for my use case. Both high refresh rate and HiDPI are a must from me, my eyes are not as swell as when I’m younger.