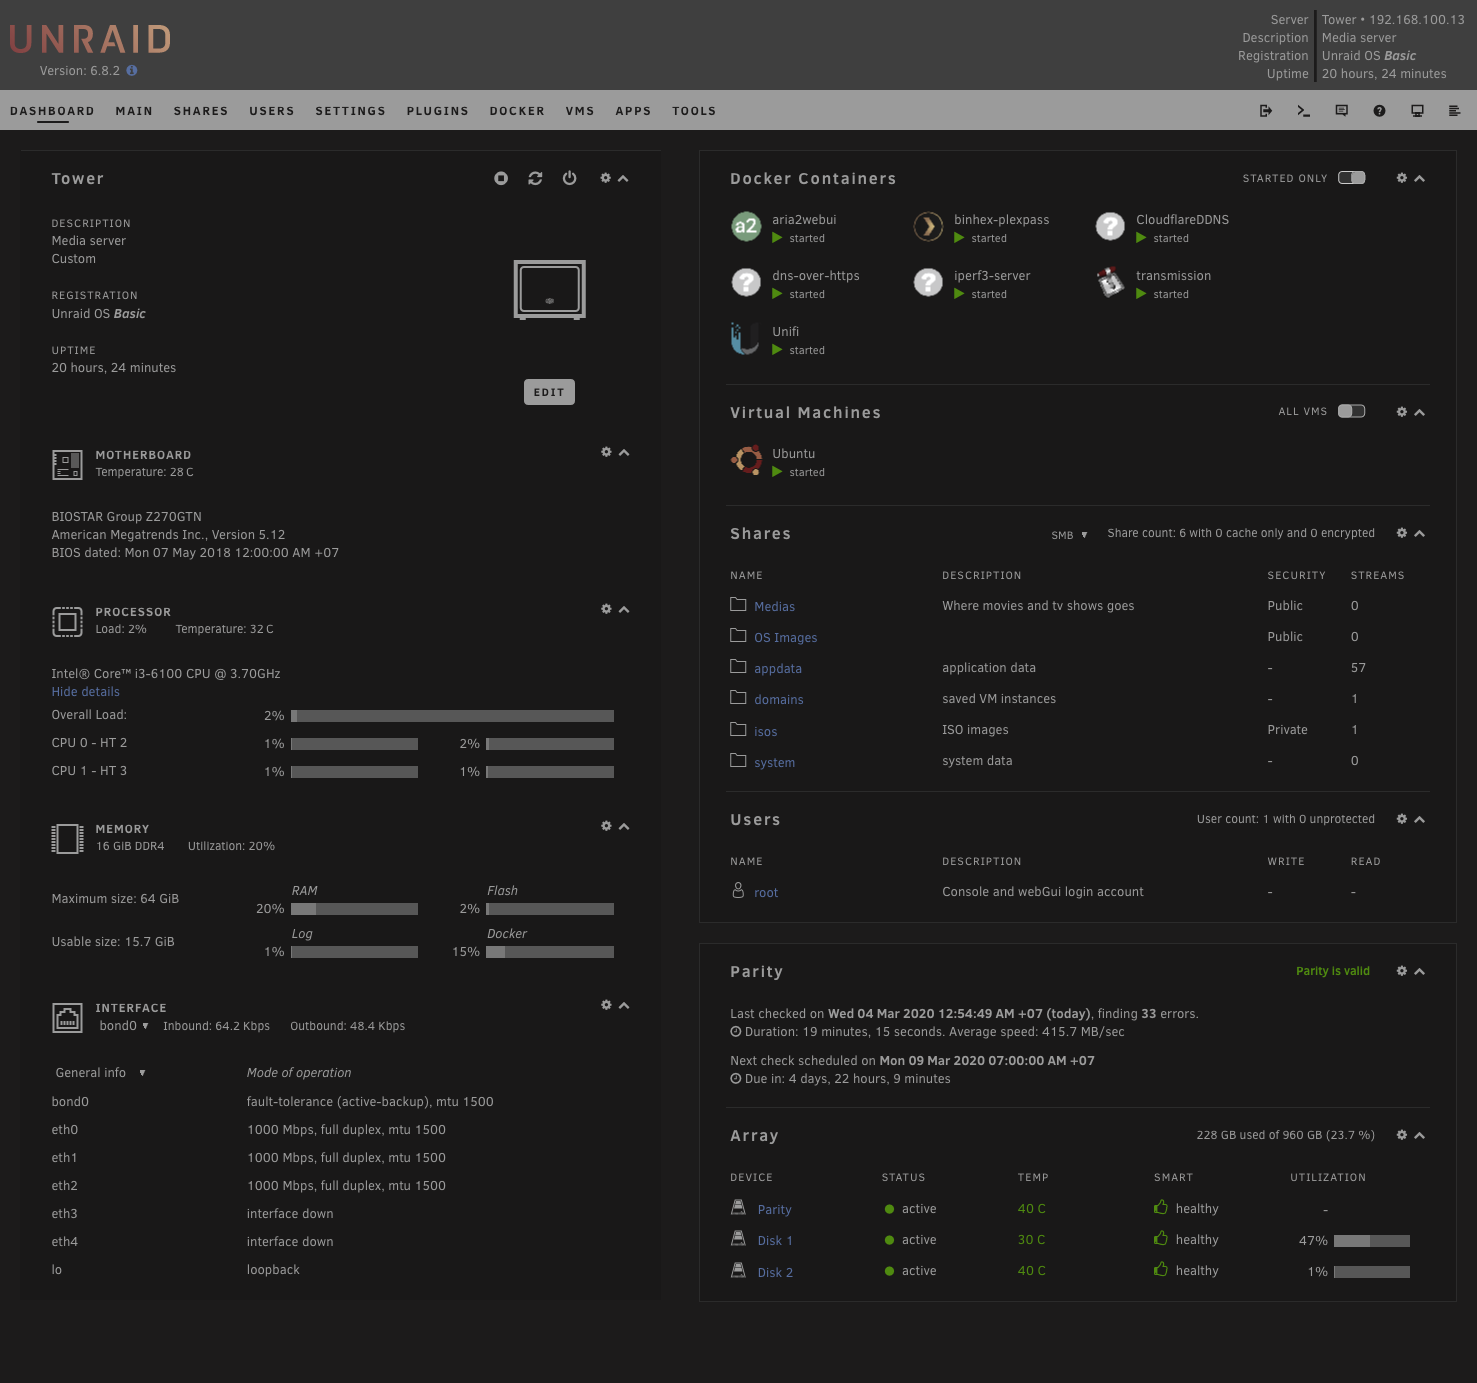
I made the jump to buy a license for my Unraid box and finally writing this blog post to elaborate what I’ve done with it. Such simplicity with the power to do anything you can imagine off of a home server. I still think I’m only scratching the surface here, haven’t even begun to maximize my usage.

There are a few more new additions to the box I want to talk about in this blog post.
Drive Array
After buying the license for Unraid, it’s only logical to add more drives to the array. I now have 3 SATA SSD’s plugged in with 1 of it serving as a parity drive. Each drive is 480GB in size which gives me 960GB of usable storage.
I was surprised how much time it took to sync the parity drive to my existing drive. I fell asleep waiting for it to finish.
After syncing the parity drive, only then I can add another drive to the array. I made the mistake of not formatting the drive first for the array. When it joined the array, it had no filesystem and was unmountable. So I installed Unassigned Drive and Unassigned Drive Plus to format the drive. Afterwards, adding it to the array was straight forward.
My next addition would be to add a cache drive which I plan to be an NVMe drive and also populate another 3 SSD’s to the array to max out my 6 attached storage allowance. This is another story for another time.
Box’s Hardware Limitation
The box was built from a Mini ITX motherboard. I have never built a PC as tiny as this, curiosity got the better of me. As I mentioned on my blog post before, I installed a 4 port Intel Gigabit Ethernet card in the only PCIe slot. I want this to provide bonding for failovers.
What surprised me was Unraid automagically created the bond interface for the 4 ports and added my onboard LAN port into the bond. I had a total of 5 Gigabit ports bonded. I only used 2 ports from the Intel card and the onboard LAN.
The motherboard I used comes with 4 SATA ports. As of this writing, I’ve used 3 out of 4 ports for 2 array drives and 1 parity drive. This leaves me with only 1 SATA port left. My theoretical max array size would be 1440 GB which is enough for now.
But I kept thinking about adding more drives and I was really limited with only 4 SATA ports and 1 PCIe slot. I can’t add more SATA ports because the PCIe is already used. I can sacrifice the Intel card but it came from a server, I like it. I’m pretty sure though 1440 GB won’t last long before I need to add more.
So then I accepted the limitation of the hardware. After all this box was built purely out of curiousity which became a real solution. In the future if I want to have more storage, I’ll just have to build a new box with more room for expansions.
Cloudflare DDNS
I tried several different kinds of community apps to use Cloudflare as a DDNS provider. I eventually coded something for myself published in Github.
Full instructions are there on the repo.
The codes does 1 thing only which is to update a subdomain I created in Cloudflare with the public IP of my home connection. After I did this, I eventually found out my ISP is on the strict side of opening ports. It’s pretty much useless for my home connection but it could be something useful for someone else.
DNS Over HTTPS
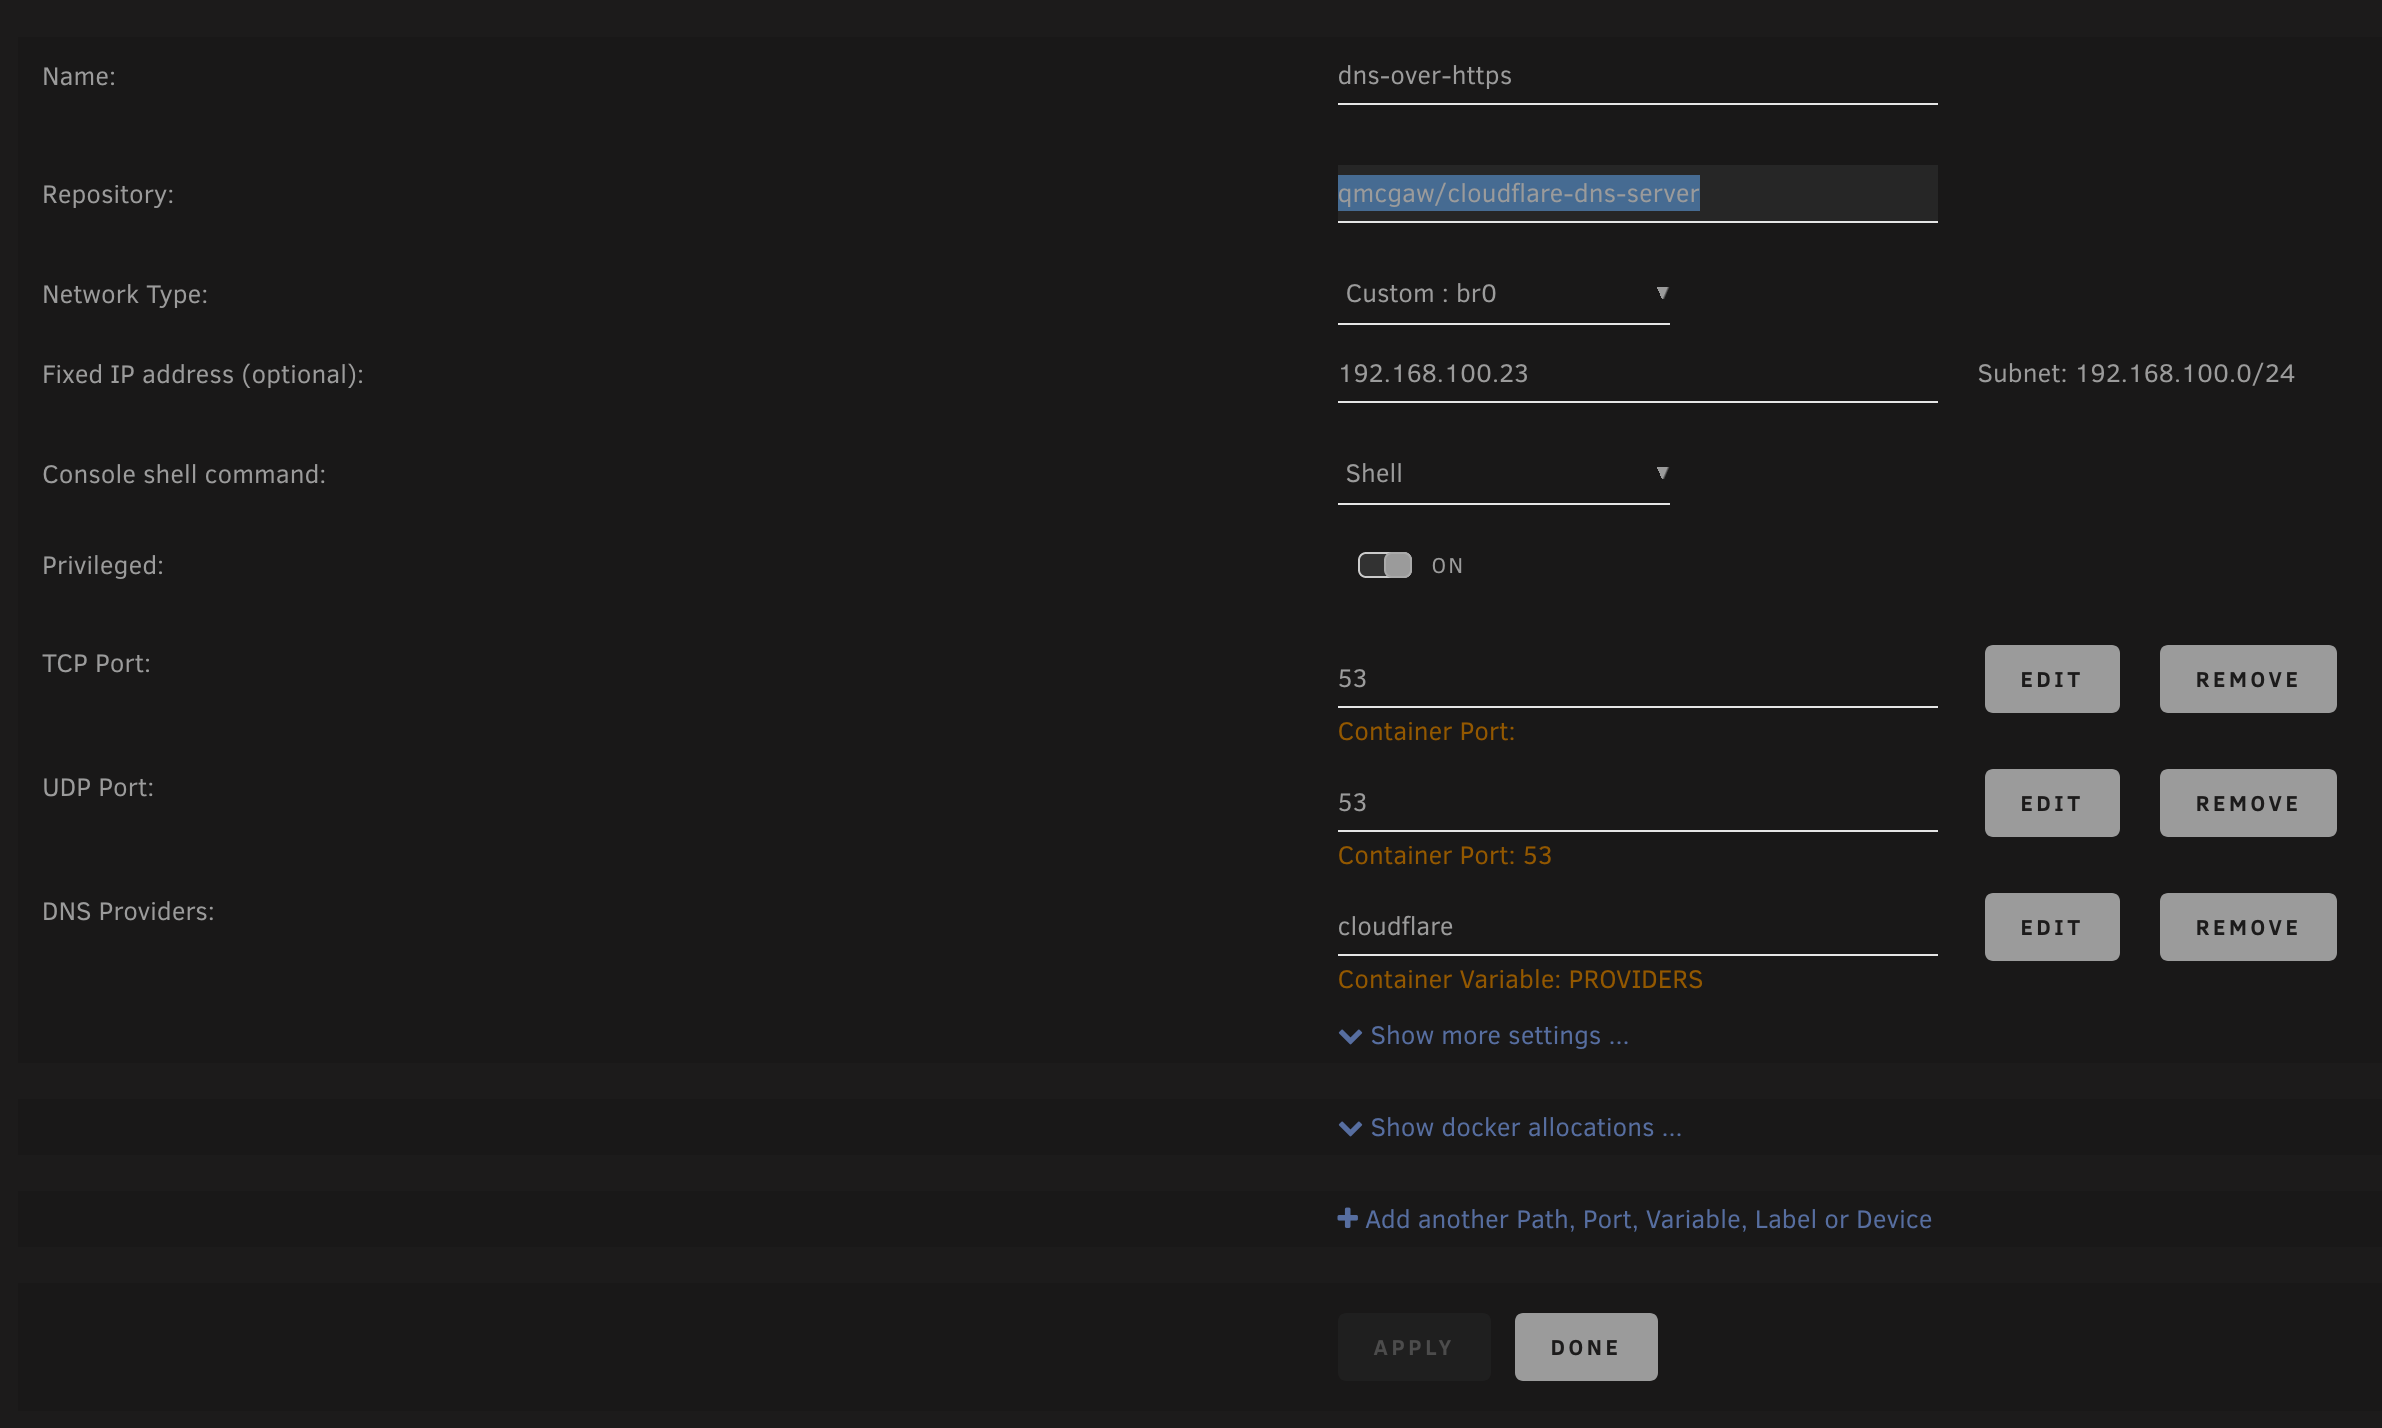
I found many community apps offering this but none worked reliably. Ended up searching Docker Hub for a straightforward solution. I found this docker repo.
https://hub.docker.com/r/qmcgaw/cloudflare-dns-server
Here’s a screenshot of how I set up the docker repo above into my Unraid box.

It’s as straightforward as it gets.
Iperf 3 Server
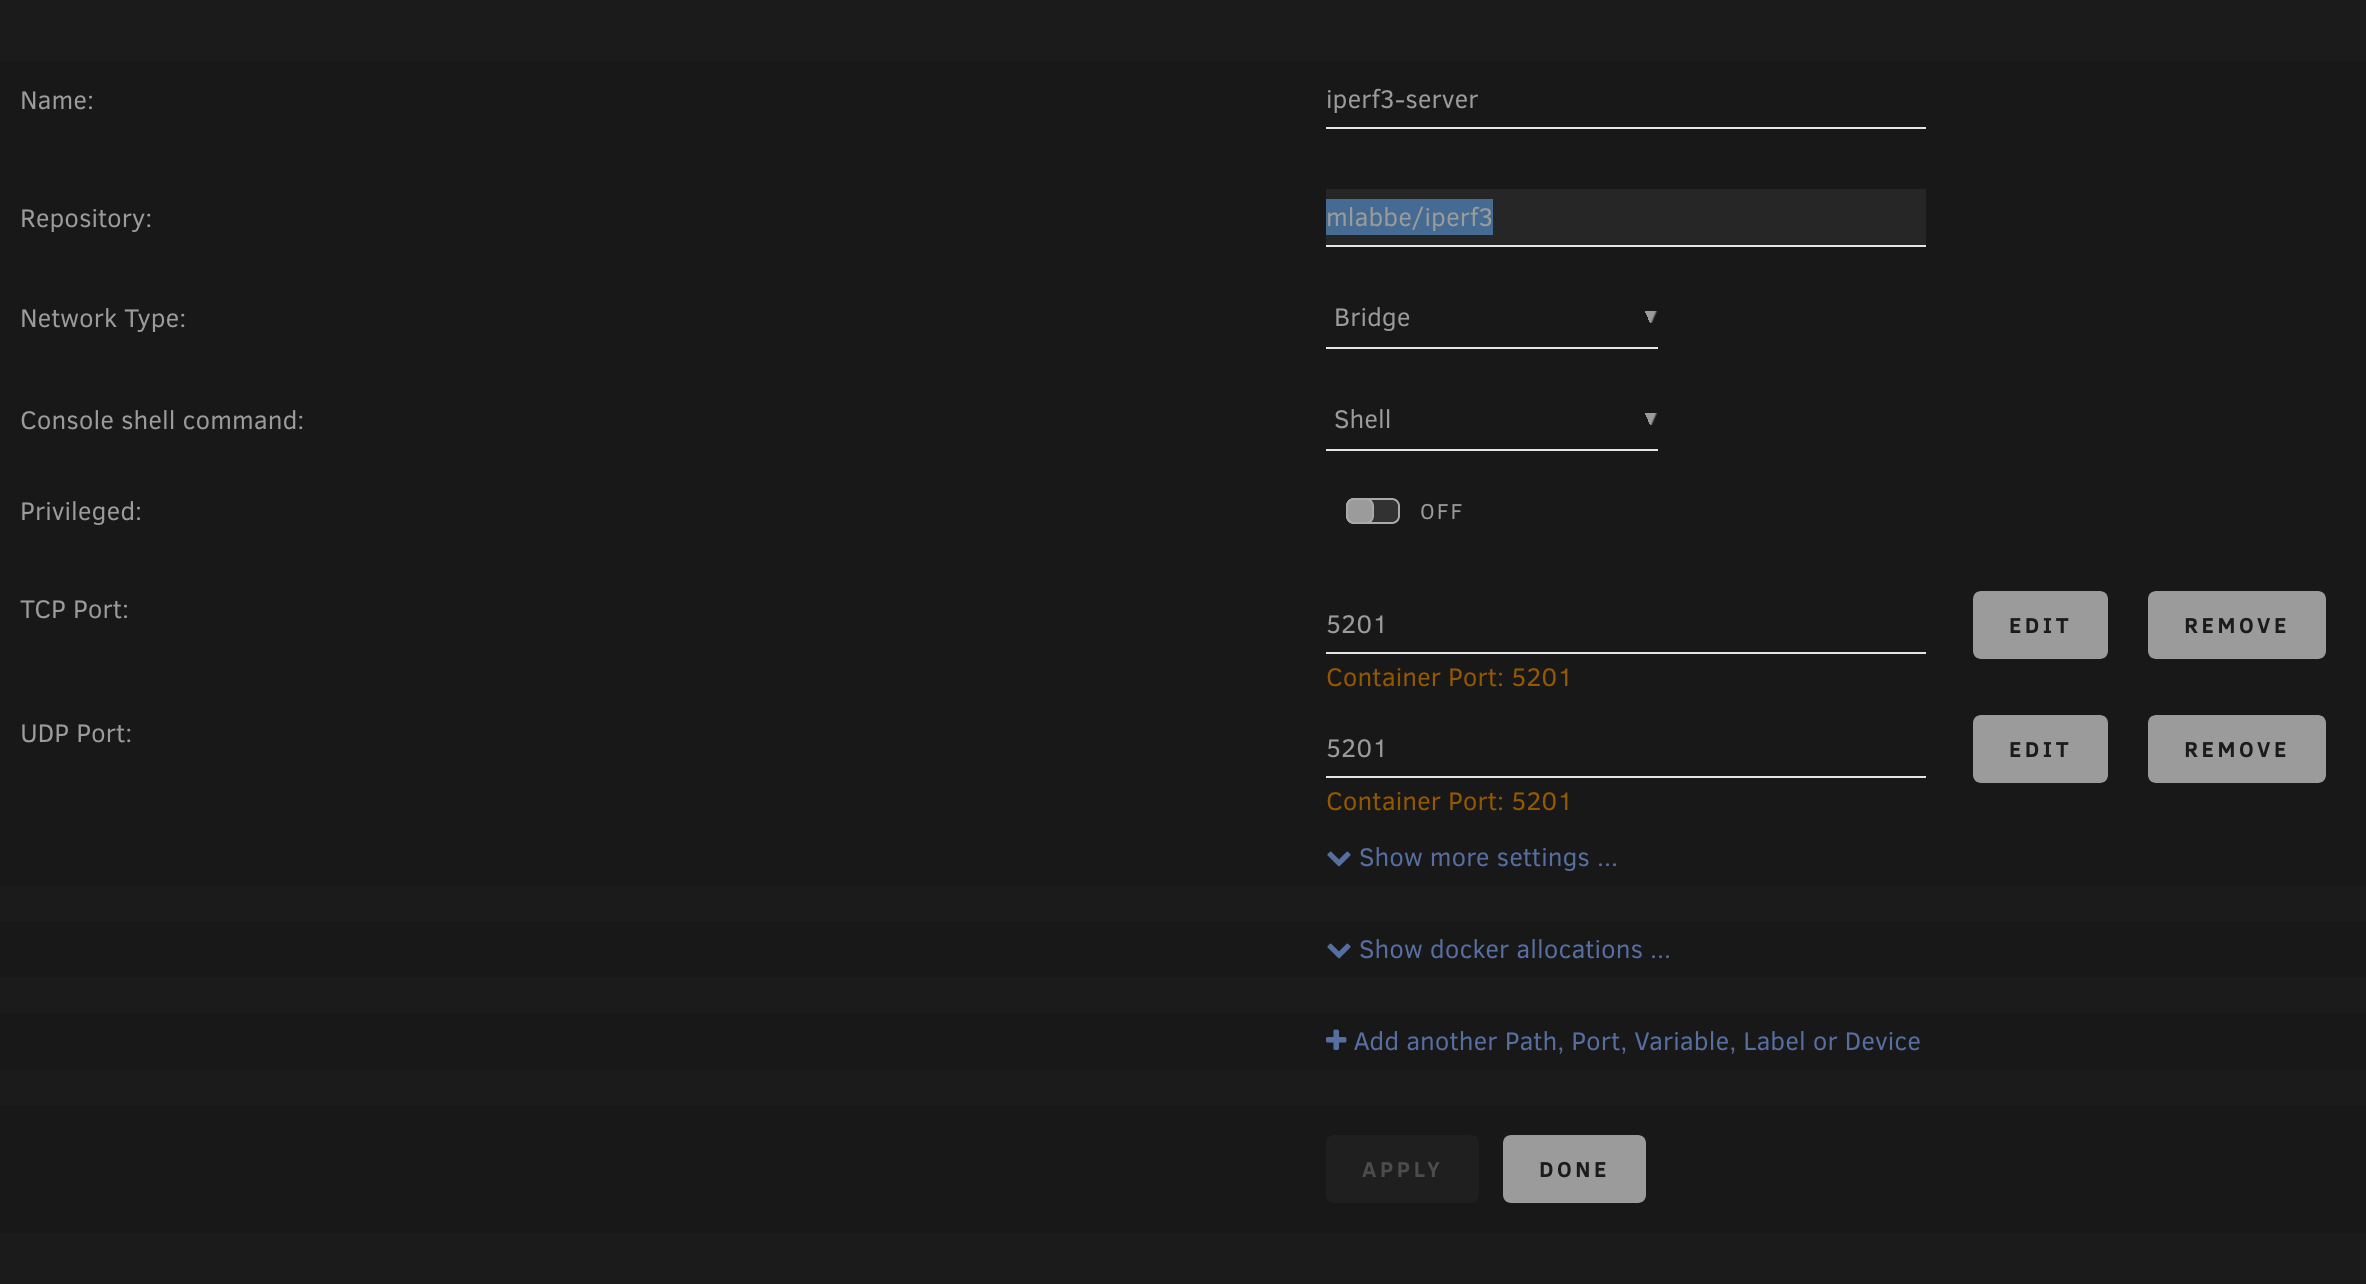
I needed to test my upstair LAN speed. Didn’t find anything from the community apps so I search Docker Hub. Here’s the repo I used for this.
https://hub.docker.com/r/mlabbe/iperf3
It does the job as expected, here’s my settings for it.

Unifi Controller
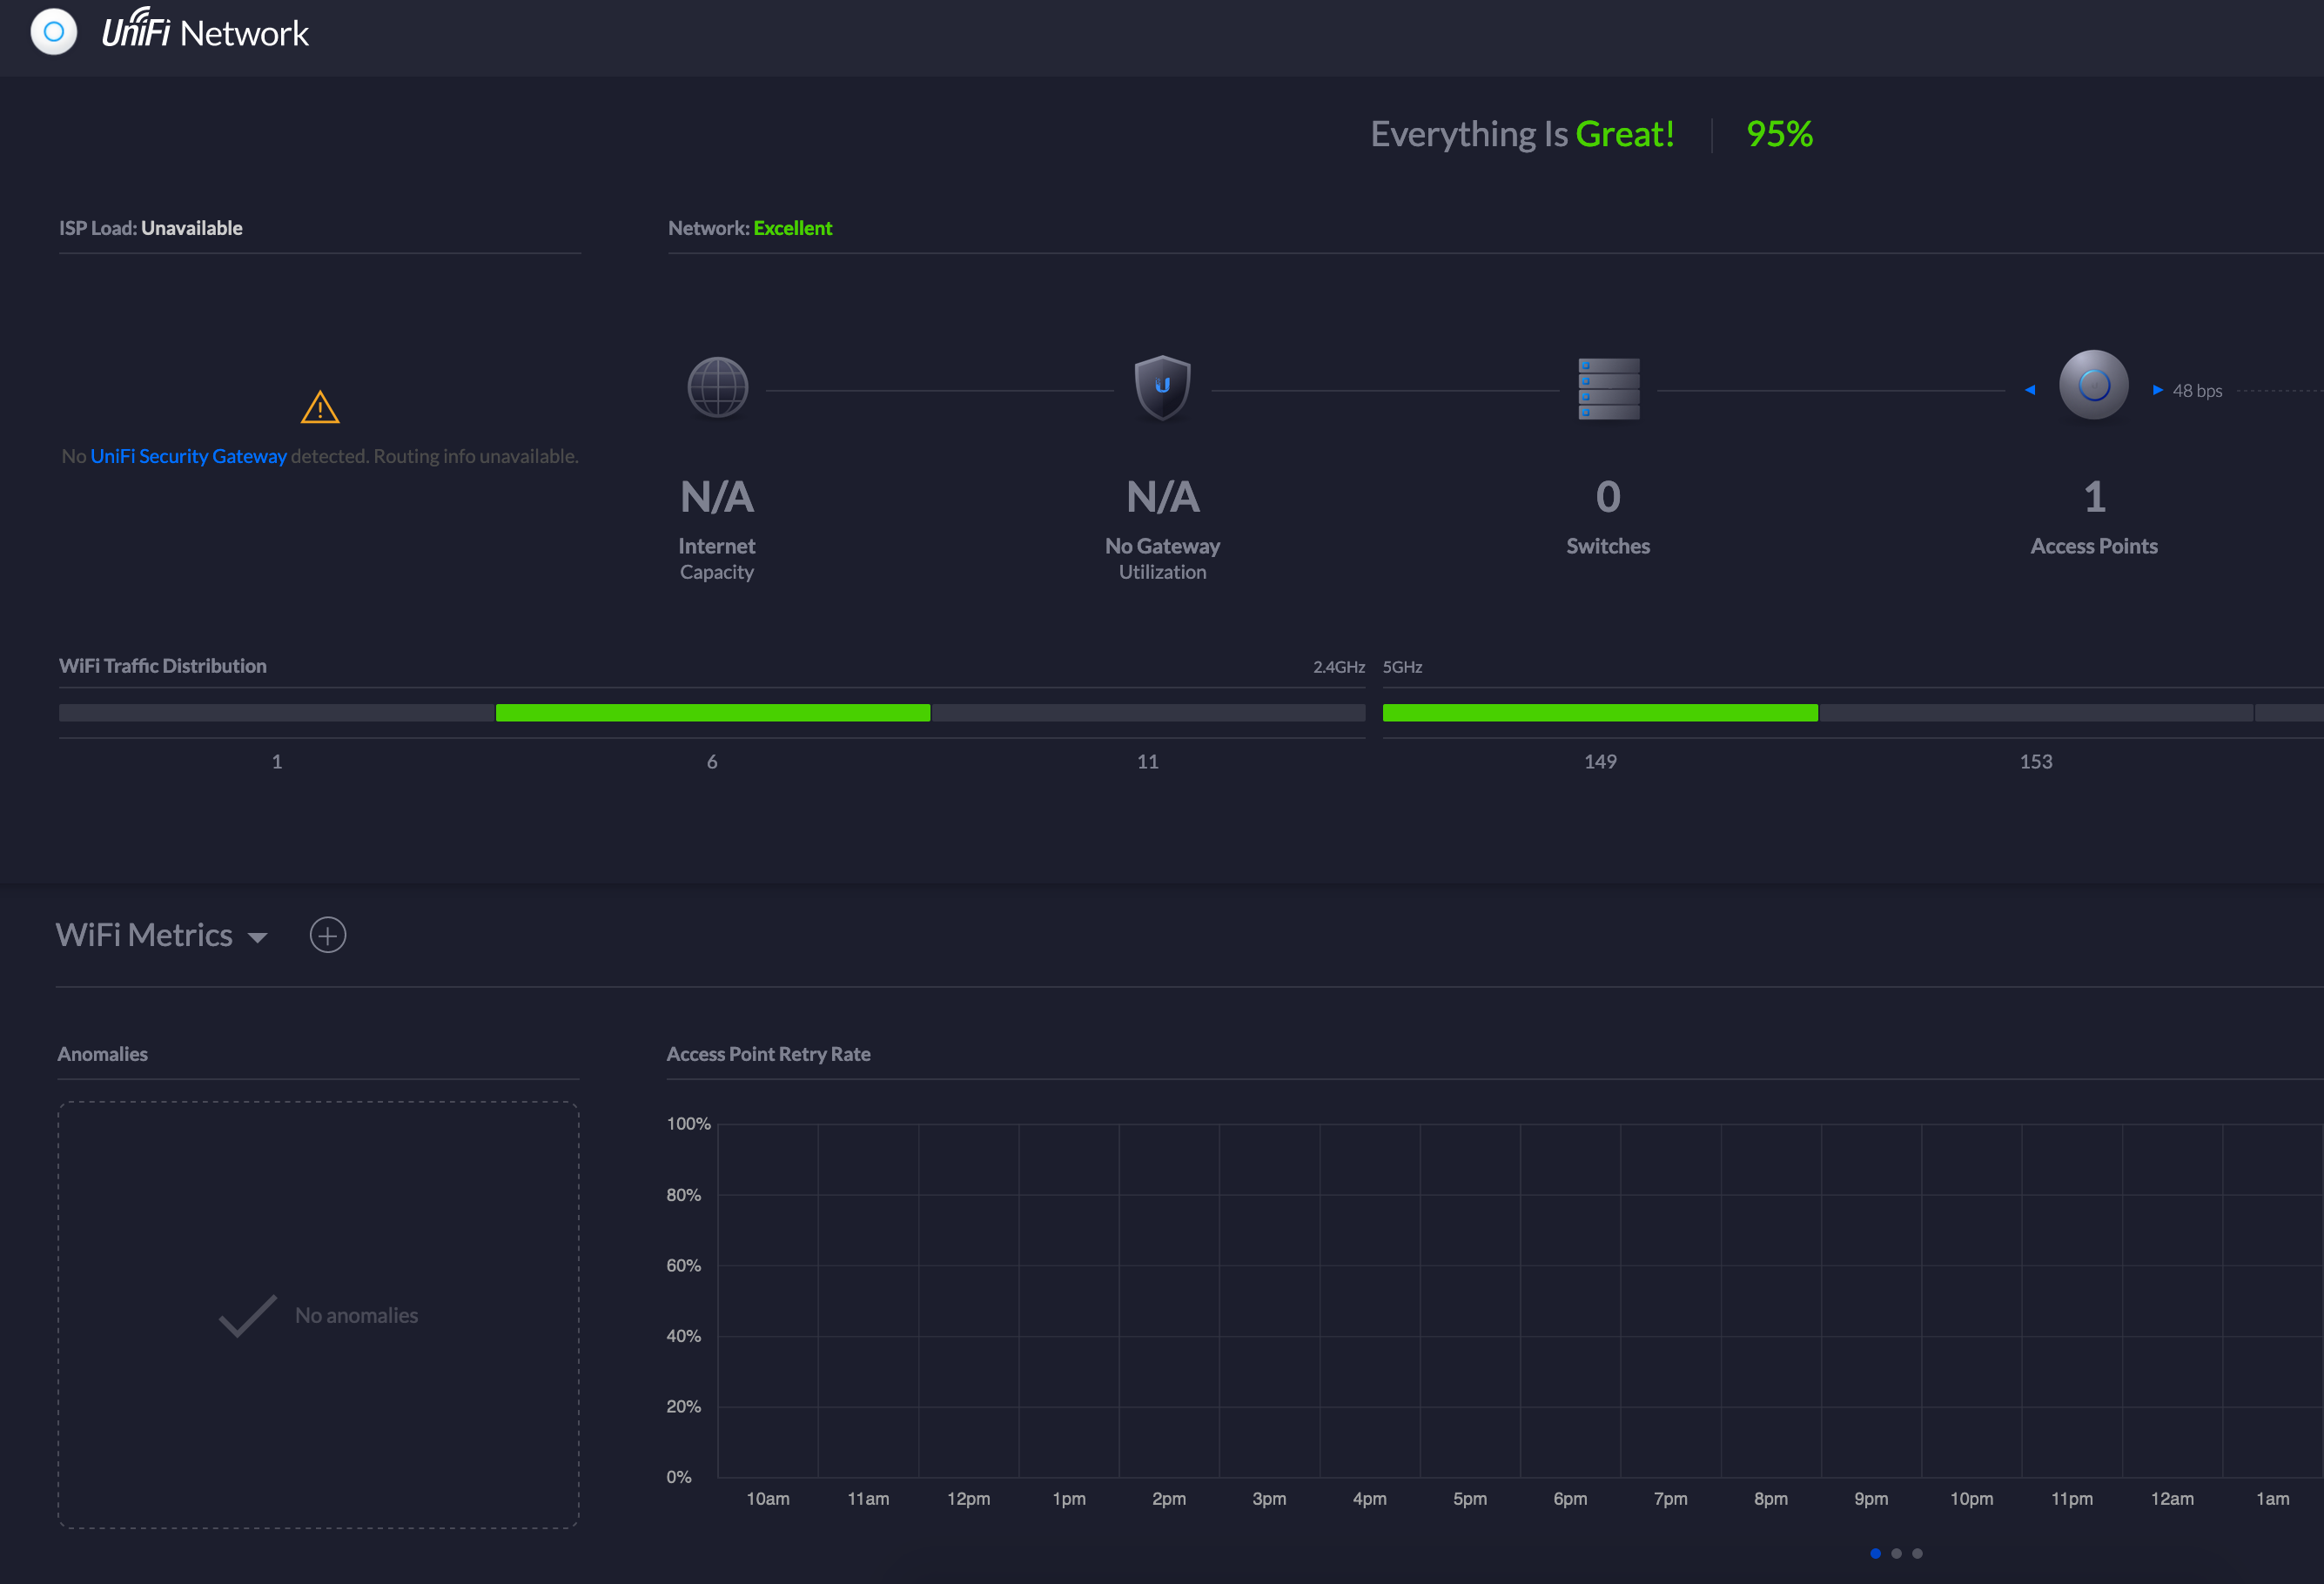
The wifi connection downstairs is served by a Unifi AP AC Pro. I can’t remember how I set it up initially. Found a Unifi Controller app in the community apps. Immediately set it up to adopt that poor AP.

There is still much to do with this Unifi setup. I’m only using it as a WIFI AP while in truth there is so much more to do with it. This is a story for another blog post.
Ubuntu VM for VPN Gateway
I talked about Ubuntu as a VPN Gateway before here. I basically made it happen within Unraid. Unraid provides an easy way to run VM’s through its libvirt support. We can run all kinds of OS with hardware passthroughs as easy as a few clicks. Unraid really lifted the burden of setting up a cool machine.
I use ExpressVPN daily. They provide Linux executables to run their VPN client. I used that instead of OpenVPN. I don’t need GUI for this so I installed from Ubuntu’s server image.
Again I’m still scratching the surface here. My next thing would be to be able to access my files from anywhere in the world. Plex already give me my medias, I want to extend this. A story for another time.
Very happy with Unraid, I recommend this to anyone planning to build a home server.
